

Connect Microsoft Entra ID
Let people sign in with their work account, MFA included, and keep the portal's people list in step with Entra.
You will create two applications in Entra and copy a few values back and forth with the portal.
| Application | Kind | Does |
|---|---|---|
ECV AI Portal | App registration | Signs people in, and reads the SharePoint sites you allow |
ECV AI Portal Provisioning | Enterprise application | Pushes joiners, leavers and groups to the portal |
Why two? Entra only allows provisioning on an application created from Enterprise applications.
Before you start
| Task | Microsoft role you need (any one) |
|---|---|
| Create both applications | Application Administrator, Cloud Application Administrator |
| Grant admin consent (step 5) | Global Administrator, Privileged Role Administrator |
Consent Sites.FullControl.All for Graph Explorer | Global Administrator, Privileged Role Administrator, Cloud Application Administrator, Application Administrator, AI Administrator |
| Give the portal read access to SharePoint sites | SharePoint Administrator or higher, and a member of the site |
- Provisioning needs a Microsoft Entra ID P1 licence. A free tenant can do sign-in but not provisioning.
- No inbound ports to open: Entra reaches the portal over the internet.
- Keep the portal open in a second tab at Admin console › Organisation › Sign-in & provisioning.
Part 1: the sign-in application
-
Copy the redirect URI
In the portal, copy the Redirect URI. It looks like
https://<portal>/idp/realms/ai-portal/broker/<slug>-idp/endpoint, where<slug>is your organisation ID, set in the first-run wizard. -
Note your tenant
On the Entra ID Overview page, write down the Tenant ID and the primary domain.
-
Register the application
App registrations › New registration. Name it
ECV AI Portaland keep the default account type (this organisation only). Under Redirect URI choose Web and paste the address from step 1. Select Register, then write down the Application (client) ID from the Overview page. -
Create a client secret
Certificates & secrets › New client secret, description
ECV AI Portal, expiry 24 months, Add. Copy the Value and Expires columns straight away: once you leave the page the value is gone.Sign-in and SharePoint share this secret. When it expires, people cannot sign in and SharePoint syncs stop, so plan a new one before that date.
-
Add permissions
API permissions › Add a permission › Microsoft Graph:
Type Permission Why Delegated email,openid,profileSign-in Application Sites.SelectedRead only the SharePoint sites you grant (Part 3) Application or Delegated ProfilePhoto.Read.AllOptional. People’s pictures Sites.Selectedmust be Application: the portal syncs on a schedule, even when nobody is signed in. ForProfilePhoto.Read.All, pick Application to read everybody’s photo on a schedule, or Delegated to read each person’s at sign-in, and choose the matching answer in the portal’s People’s pictures.New permissions read Not granted. Select Grant admin consent and confirm: every row in Status turns green.
-
Add the upn claim
Token configuration › Add optional claim, choose ID, tick
upnnear the end of the list, then Add. Accept if Entra offers to turn on a related permission. -
Enter the values in the portal
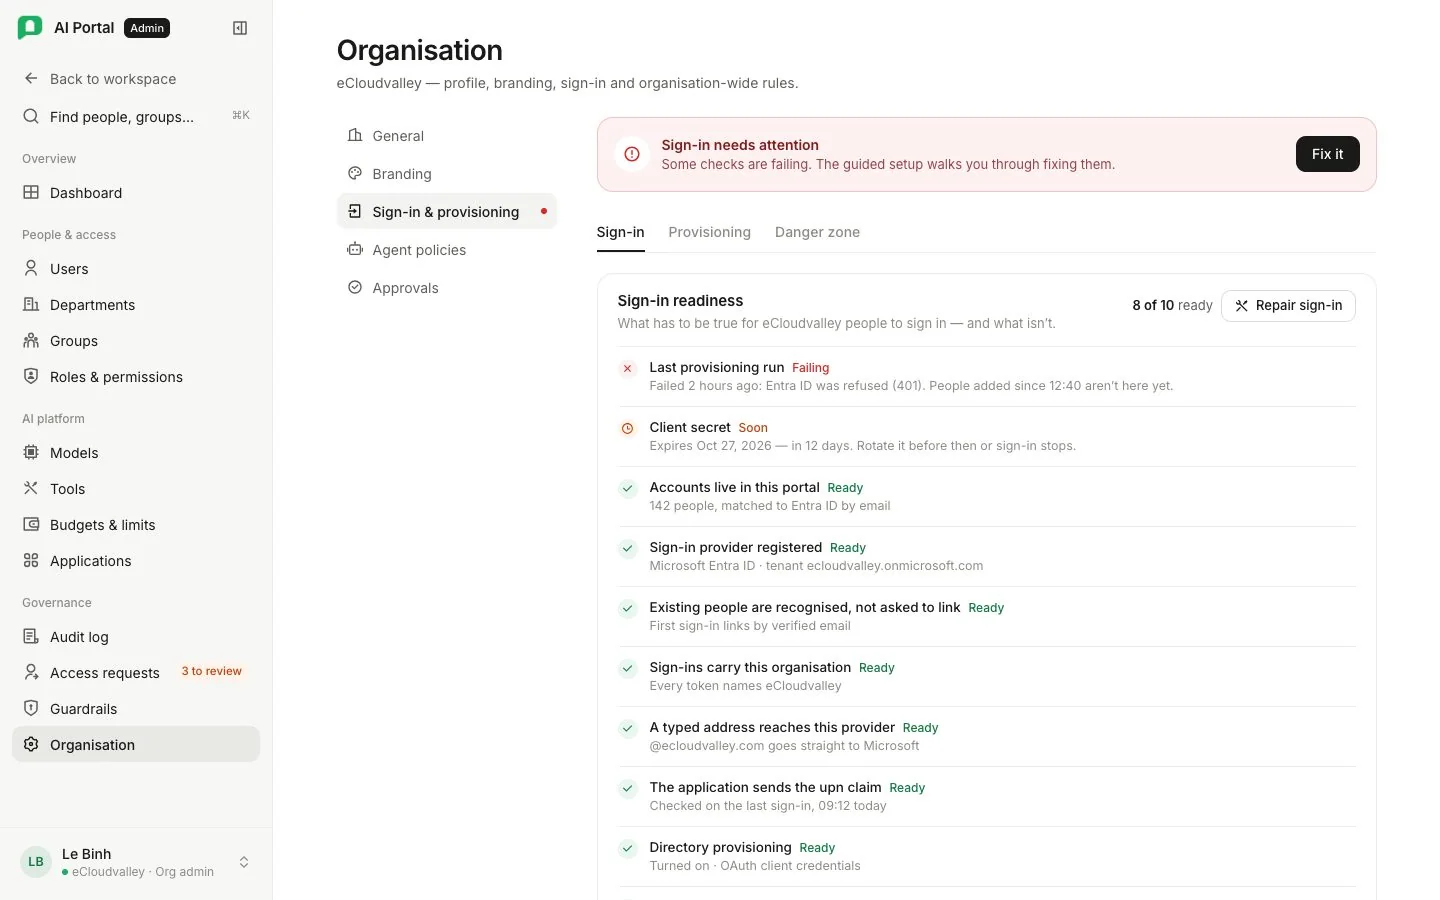
On Sign-in & provisioning, select Register a provider (or Change provider) and enter the Tenant ID, Application (client) ID, client secret, the secret’s expiry date and your people’s email domain. The portal reminds you 30 days before the secret expires.
The guided setup then runs Check sign-in: each check either passes or names what to fix. Repair sign-in re-applies the portal’s sign-in settings with the stored secret, which fixes most failing checks.
Part 2: the provisioning application
-
Create the application
Enterprise applications › New application › Create your own application. Name it
ECV AI Portal Provisioning, choose Integrate any other application you don’t find in the gallery (Non-gallery), then Create. -
Create a provisioning credential
In the portal, issue a provisioning credential. It shows four values: Tenant URL, OAuth token endpoint, Client identifier and Client secret. The secret appears only once, so leave the page open until you have pasted everything into Entra.
-
Connect Entra to the portal
In the new application, open Provisioning › Connect your application. Set Authentication Method to OAuth2 Client Credentials Grant and paste the four values into the boxes with the same names. Test connection, wait for success, then Create.
-
Map externalId to objectId
Attribute mapping › Users. Find the row whose target is
externalId, change its source toobjectId, and Save. The default source,mailNickname, can change, and when it does the portal would treat that person as someone new. Leave the other rows and the Groups tab as they are. -
Turn provisioning on
Under Settings, pick a Scope: Sync all users and groups if everyone uses the portal, or Sync only assigned users and groups, then assign people or their groups under Users and groups (anyone not assigned cannot sign in). Set Provisioning Status to On, Save, then Start provisioning on the Overview.
Entra syncs every 20 to 40 minutes. To test now, use Provision on demand for one person; errors show in Provisioning logs. Use Restart provisioning after changing a mapping.
Replacing the provisioning credential stops the old one at once, whichever method you pick, so paste the new values into Entra in the same sitting.
Part 3: let the portal read SharePoint (optional)
Only needed if knowledge bases will sync SharePoint folders. Reuse this app’s values under Tools › SharePoint, then grant each site in Graph Explorer. Every step is in SharePoint setup.
Check it works
People open the portal and choose Sign in with Microsoft. Microsoft signs them in (with MFA) and brings them back. The email and password form under the button is only for accounts the portal holds itself, such as the Owner created during setup; a company account has no portal password.
- A leaver is disabled at the next sync; their record is kept, so audit history points at a real person. A returner reuses it.
- Email, name and status are edited only in Entra. Department, budget and feature access are managed in the portal.
- Deleting a group in Entra removes the roles and visibility attached to it in the portal.
- Suspending someone in the portal blocks them at once, even while their Entra account is active. Access needs both to allow it.
When a joiner cannot sign in
- Is provisioning on? If not, finish Part 2.
- Does Last sync read never? No push has landed yet.
- Otherwise the joiner was added since the last push. Wait 20 to 40 minutes, or use Provision on demand.
Afterwards
Create a new client secret before the old one expires and enter it on both Sign-in & provisioning (Rotate secret) and Tools › SharePoint.